Code reusability and modular design are what have made React one of the best JavaScript frameworks out there. Also, thanks to NPM, publishing a new JavaScript module has never been easier. All you need to do is point the main JavaScript file in your package.json and run npm publish. Although, you need to take care of a few more things when it comes to publishing a TypeScript package, and that's what we'll discuss in this guide.
Why TypeScript?
TypeScript is a strict syntactical superset of JavaScript and adds optional static typing to the language, giving you the ability to write code free from the JavaScript type errors.
You don't necessarily need to use TypeScript to create a React module, but adding TypeScript results in a much better DX in editors like VSCode, where users get better IntelliSense via the type definitions.
Also if your library becomes popular you will need to add type-definitions sometime, and writing and maintaining those manually is error-prone and wastes a lot of time.
And I think this goes without saying that TypeScript makes your code more robust and less prone to errors.
Let's Begin
We'll be building a small library with a create-react-app demo to help you understand the basic boilerplate setup for building and publishing a TypeScript React library, with the following steps -
- Initializing a project and adding TypeScript
- Setting up TypeScript config
- Compiling TypeScript
- Adding React
- Setting up the demo
- Getting ready for Publishing
Initializing a project and adding TypeScript
We'll start by going through the setup of a plain JavaScript module using yarn init in a fresh folder and answering the prompts accordingly
$ yarn init
yarn init v1.22.4
question name (typescript-react-test):
question version (1.0.0):
question description: Learning how to create React modules using TypeScript!
question entry point (index.js):
question repository url:
question author:
question license (MIT):
question private:
success Saved package.json
Since we want to write code in TypeScript, we need to set up the build step that will transpile our TypeScript code to JavaScript.
Install TypeScript as a dev dependency by running:
yarn add --dev typescriptWhile you're at it, don't forget to set up git in your folder and regularly commit; if you’re a beginner to git, I would recommend going through this git tutorial for beginners.
Setting up TypeScript config
To compile TypeScript and enforce/ignore certain rules, we will need to create a config file called tsconfig.json in the root directory. At the time of writing this tutorial, I'm using TypeScript version 4.0.2. So if something is not working for you, it might be because some keys might have been updated or deprecated. I would recommend you to consult the release notes for that.
{
  "compilerOptions": {
    "outDir": "lib/esm",
    "module": "esnext",
    "target": "es5",
    "lib": ["es6", "dom", "es2016", "es2017"],
    "jsx": "react",
    "declaration": true,
    "moduleResolution": "node",
    "noUnusedLocals": true,
    "noUnusedParameters": true,
    "esModuleInterop": true,
    "noImplicitReturns": true,
    "noImplicitThis": true,
    "noImplicitAny": true,
    "strictNullChecks": true,
    "suppressImplicitAnyIndexErrors": true,
    "allowSyntheticDefaultImports": true
  },
  "include": ["src"],
  "exclude": ["node_modules", "lib"]
}
Some of the important parameters we are using here are -
- outDir - Specifies the output build directory for our compiled code. Since this would create an ESM build, we would output it to a folder called
lib/esm. I'll explain why we did this later in this post. - module - Sets the module system that your code will be compiled to. TypeScript supports a variety of module types.
- target - The ECMAScript version target we want TypeScript to compile to.
- lib - Specified the built-in JS libraries that you want to support.
- include - Filename patterns that the compiler should scan.
- exclude - Filename patterns that the compiler should ignore.
TypeScript offers a lot of flags for type checking and compiling.
It's time to test our setup now, create a file src/index.ts and add the following snippet to it -
export function sayHello(name: string) {
    return `Hey ${name}, say hello to TypeScript.`;
}
Next, add the following build script to your package.json -
"scripts": {
    "build": "tsc"
 }
Now run yarn build inside your root folder, and you should see a folder called lib/esm with the following files -
index.js- The compiled output file.index.d.ts- The type definitions for your code.
Compiling TypeScript
Although we completed the setup for TypeScript and added a build script in the last step, we're not quite ready yet. To be able to publish our package to NPM, you need to be aware of the different types of modules available in the JavaScript ecosystem -
- CommonJS - This module format is most commonly used with Node using the
requirefunction. Even though we are publishing a React module (which will be consumed by an application generally written in ESM format, then bundled and compiled by tools like webpack), we need to consider that it might also be used within a Server side rendering environment, which generally uses Node and hence might require a CJS counterpart of the library (ESM modules are supported in Node environment as of v10 behind an experimental flag). - ESM - This is the modern module format that we normally use in our React applications in which modules are defined using a variety of import and export statements. The main benefit of shipping ES modules is that it makes your library tree-shakable. This is supported by tools like Rollup and webpack 2+.
- UMD - This module format is not as popular these days. It is required when the user requires our module using a script tag.
So for our package, we will add support for both ESM and CommonJS modules. Currently, if you open the index.js file in the lib/esm folder, you will find that it's using the ESM format because we specified the module type to esnext in the tsconfig compiler options. That's the reason why I asked you to send the output to the lib/esm folder when setting up TypeScript.
To create a CommonJS module, add the following script to the scripts key in your package.json
"build:cjs": "tsc --module commonjs --outDir lib/cjs",The above script would use the configuration that we defined in our tsconfig except with the module key being changed to commonjs and the output directory to lib/cjs
Also, update the build script and add a build:esm script as well, making the final scripts looking like this -
"scripts": {
    "build": "yarn build:esm && yarn build:cjs",
    "build:esm": "tsc",
    "build:cjs": "tsc --module commonjs --outDir lib/cjs"
 },
You would see two folders in your lib directory when you run yarn build, one for both ESM and CommonJS builds.
As one last step, we need to specify the entry points for different types of modules in package.json, so that module bundlers/tools can pick up the appropriate format for them.
"main": "./lib/cjs/index.js",
"module": "./lib/esm/index.js",
"types": "./lib/esm/index.d.ts",Adding React
We have the TypeScript setup up and running, now its time to add React.
Since react requires that we need to have a single copy of react-dom that is also used by the person installing it. We will be adding it as a peerDependency. Add the following snippet to your package.json.
"peerDependencies": {
    "react": "^16.8.0",
    "react-dom": "^16.8.0"
 },
But we also need React in our module, so we need to add it as a dev dependency as well -
yarn add --dev react-dom react @types/react-dom @types/reactNow let's create our React component, which will be consumed by our library users, replace the code in src/index.tsx with this -
import React from "react";

const SayHello = ({ name }: { name: string }): JSX.Element => (
  <div>Hey {name}, say hello to TypeScript.</div>
);

export default SayHello;
Setting up the demo
First let's build our library so that it can be consumed. Run the build command that we created in the last step -
yarn buildTo be able to use and test our library, we would need an example project. We will be using create-react-app with the TypeScript template for creating an example app to test our library. Run the following in the root folder -
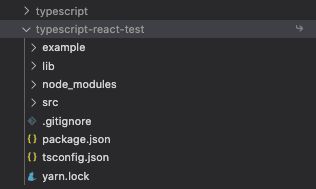
yarn create react-app example --template typescriptThe above command would create a new TypeScript React application in a folder called example.
Also since we would be using the .gitignore file in our root folder, so delete the git related files from the example folder.
rm -rf example/.gitignore example/.gitNow add the following to your root project's .gitignore file to exclude the build and node_modules folder from git.
/example/node_modules
/example/build
To use our library in the example project, just add the following to your package.json dependencies, and run yarn in the example directory.
{
  ...
  dependencies: {
    ...
    "typescript-react-test": "link:.."
  }
}
This would install the package as a local dependency for our example project. If you're curious and want to know how it works and you're using VSCode, you can expand the node_modules folder in your example project, and you should be able to see the package with a ↪ symbol next to it.
You can now add your component to the App.tsx to try it out.
import React from 'react';
import SayHello from 'typescript-react-test';
import './App.css';

function App() {
  return (
    <div className="App">
     <SayHello name="Prateek" />
    </div>
  );
}

export default App;
Run yarn start in the example folder, and you should be able to see your component in the browser. To update the lib
Getting ready for publishing
So now that we have added the demo and tested our module locally its now time to publish it to NPM so others can use it as well.
Before we get to publishing, we need to tell NPM the files that need to be included when your package is installed as a dependency. There are two ways to do that -
- Create a
.npmignorefile, which is similar to.gitignorein which you blacklist the files that you don't want your package to include. - Use the
fileskey in yourpackage.jsonto whitelist the files you want to include in your final package.
I actually prefer the latter because, as you add more types of files such as ESLint configs, environment files, you don't need to remember to keep adding them to .npmignore instead, you can specify the files to be included in your package.json
Although you can use a combination of the files key and .npmignore for certain situations like if you have __tests__ in your lib folder and you want to exclude the tests but include the lib folder, in that case, you can specify /lib in the files key of package.json and add __test__ in .npmignore so that the tests are not included, but the rest of the stuff is.
Remember that files like README, package.json, and LICENSE are automatically included in your package and cannot be excluded.
For our case, we only want to add the lib folder to the package.json because that's where all our compiled JavaScript files are. Add the following to your package.json -
"files": [
    "/lib"
 ]
Time to publish our library!
If this is the first time you are publishing a package you would need to create an account on https://www.npmjs.com/ and then you need to log in from the command line using npm login.
After that, just run npm publish in your root directory, and voila, you've successfully created and published a TypeScript React NPM package.
You can find the code of the library and the demo we created on GitHub.
Next Steps
There still many things that you can and should do that I couldn't cover in the above guide, like -
- You can deploy the demo to something like Netlify or GitHub Pages and automate the process to deploy changes when you merge PRs automatically.
- Add test cases using Jest and React Testing Library.
- Setup Husky pre-commit hook with ESLint for enforcing linting in your code.